A clipping path is a professional image editing technique in Adobe Photoshop that uses a hand-drawn vector path to separate an object from its background with exceptional precision. Unlike automatic tools, it delivers clean, smooth edges while preserving the subject’s natural details. Clipping paths are widely used for product photography, e-commerce, advertising, and print design because they create high-quality images that look polished and consistent. This method makes it easy to replace backgrounds, improve visual appeal, and prepare images for any digital or printed platform.
What Is Clipping Path?
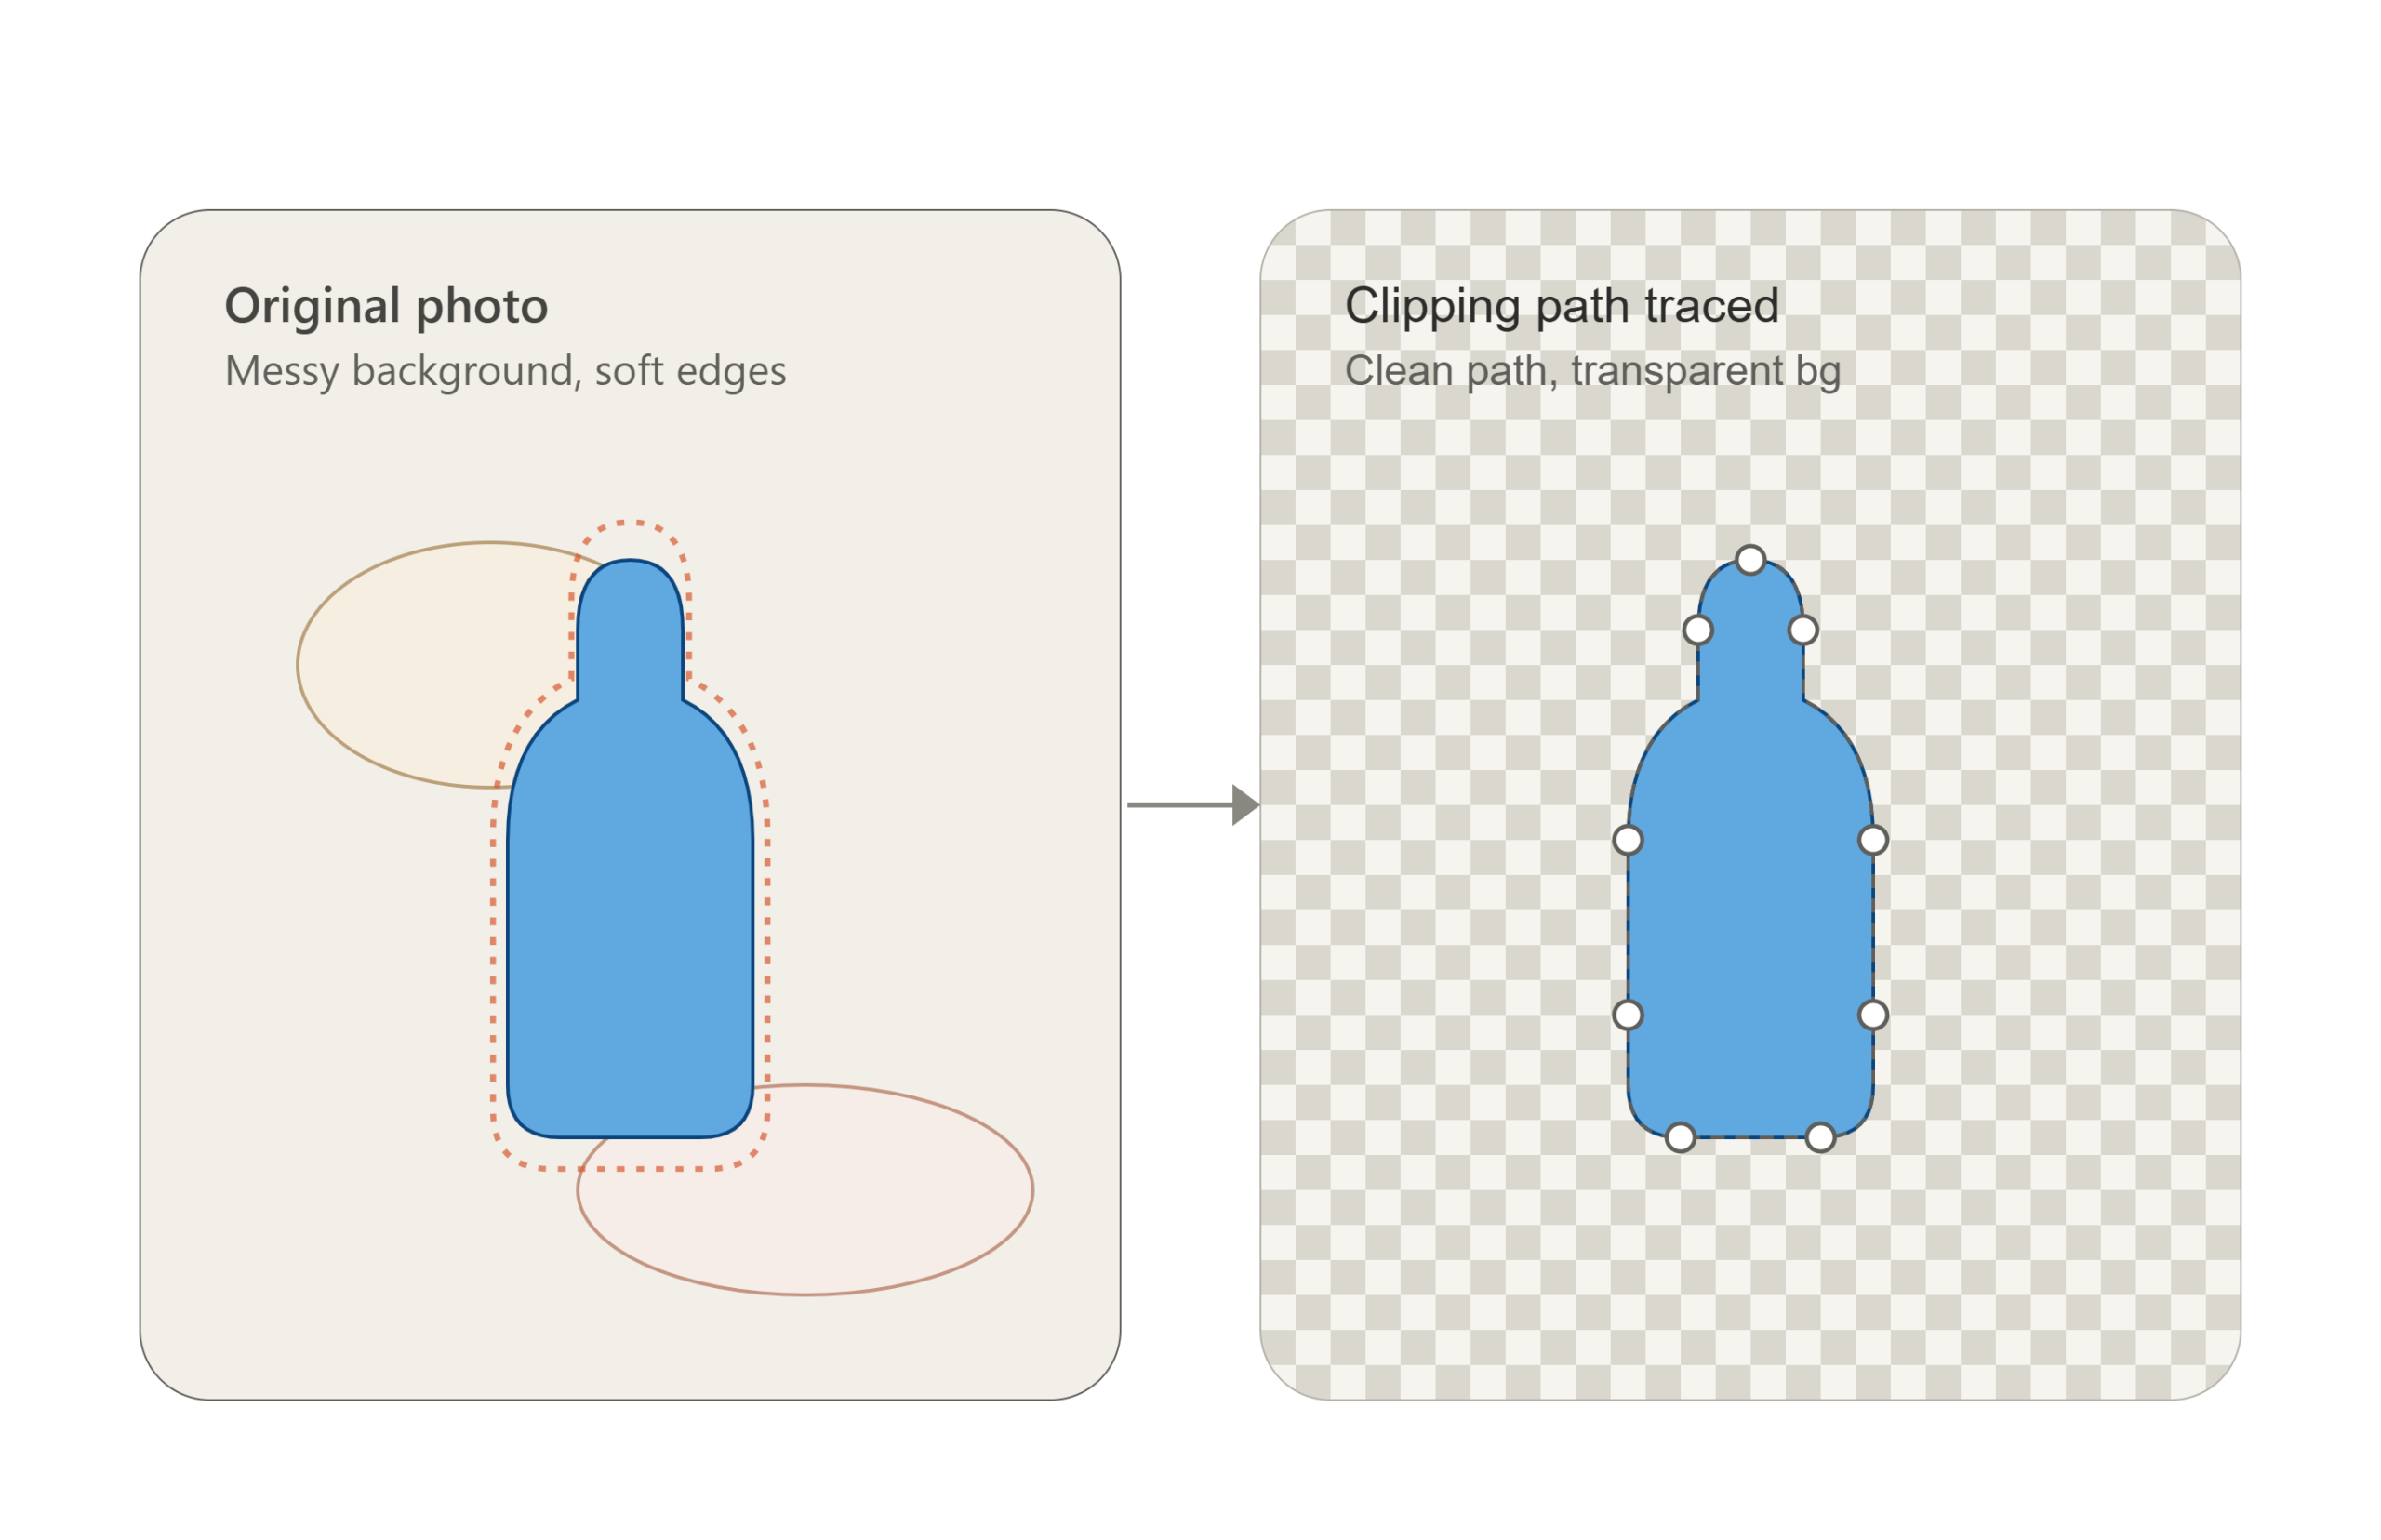
A clipping path is a vector outline. You draw it around the object using the Pen Tool, either in Photoshop or Illustrator. Once you close that outline, whatever’s inside stays. Whatever’s outside gets tossed.
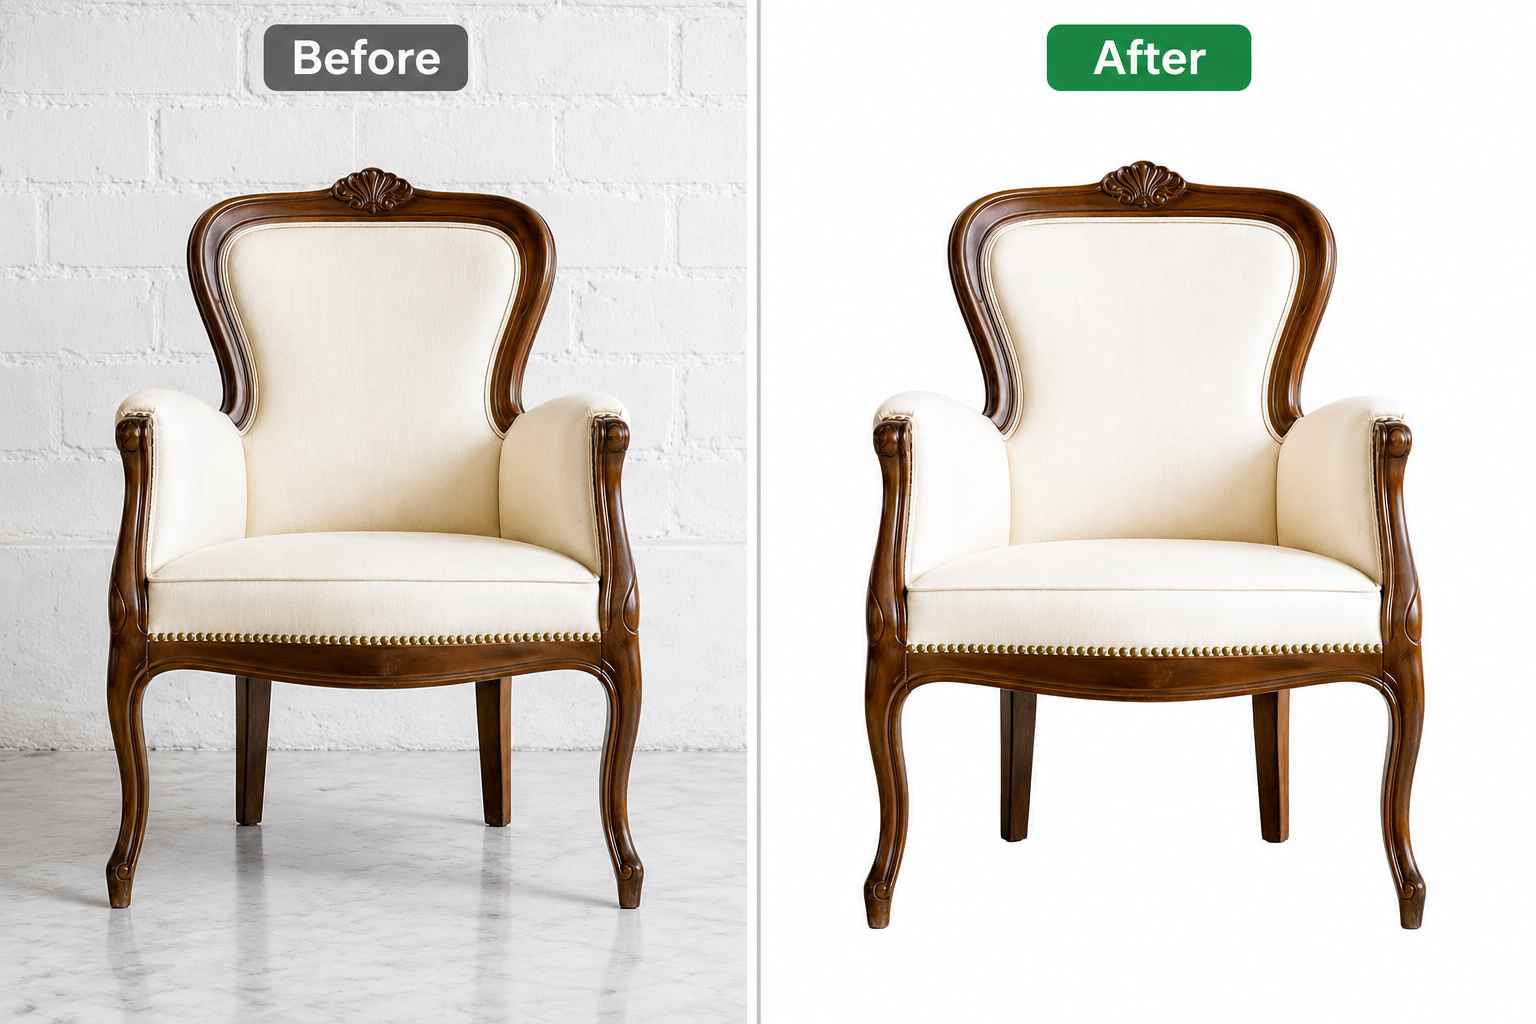
I usually explain it to clients like this: imagine tracing something with scissors, except it’s digital, and if you’re skilled, the cut is basically perfect. No jagged bits. No leftover halo around the edge. Just a clean subject you can drop onto white, transparent, or a completely different background.
That one step is why the product photos on big retail sites look like they’re floating in nothing. And it’s also why cheap product photos look cheap, no path, no clean cut, and honestly, no sale.
Why This Actually Matters (More Than People Think)
Here’s the part most articles skip over. Your photo is often the only thing between a shopper and a purchase. Nobody reads the description first. They look at the picture.
If there’s a messy background, some weird leftover shadow, or rough edges around your product, people notice, even if they couldn’t tell you exactly what’s wrong. They just scroll. And you never even find out you lost that sale.
A clean path fixes this fast. Sharp edges make a product look like it’s worth buying.
Clipping Path vs Image Masking — People Mix These Up Constantly
I get asked about this all the time, and honestly the confusion costs people money because they end up paying for the wrong service.
A clipping path is for hard, clean edges. Bottles. Boxes. Shoes. A phone. The line is sharp, and a pixel is either kept or it’s gone, no middle ground at all.
Image Masking is for the messy stuff. Hair. Fur. Loose threads on fabric. Smoke. Instead of one hard line, masking blends the edge using shades of gray so it doesn’t look like a sticker slapped onto a new background.
Quick rule I give clients: clean outline, ask for a path. Hair or soft edges, ask for masking, or sometimes both together. If a provider tries to sell you the same fix for everything, that’s usually a sign they don’t really know the difference.
The Different Types of Clipping Paths
Not every job takes the same time, and honestly not every job should cost the same either.
Simple: basic shapes, smooth edges. A mug, a candle, a box. Takes a few minutes if the editor knows what they’re doing.
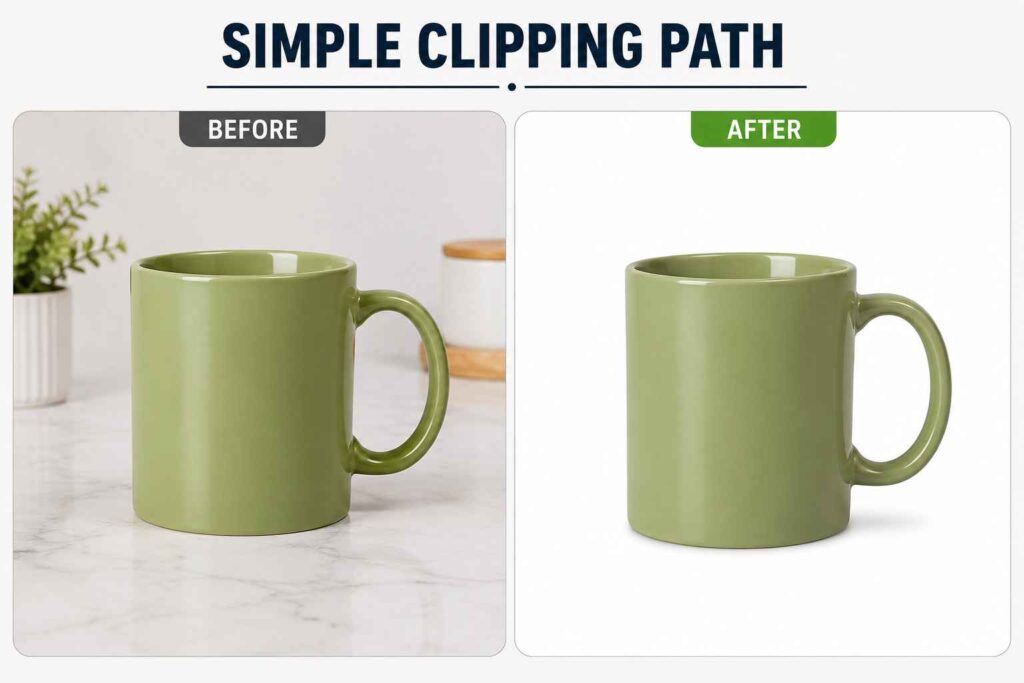
Example: A plain ceramic mug on a solid-colored background.
Medium: a bit more going on. Shoes with laces, a bag with a handle, that sort of thing. Takes more time since there are extra parts to trace carefully.
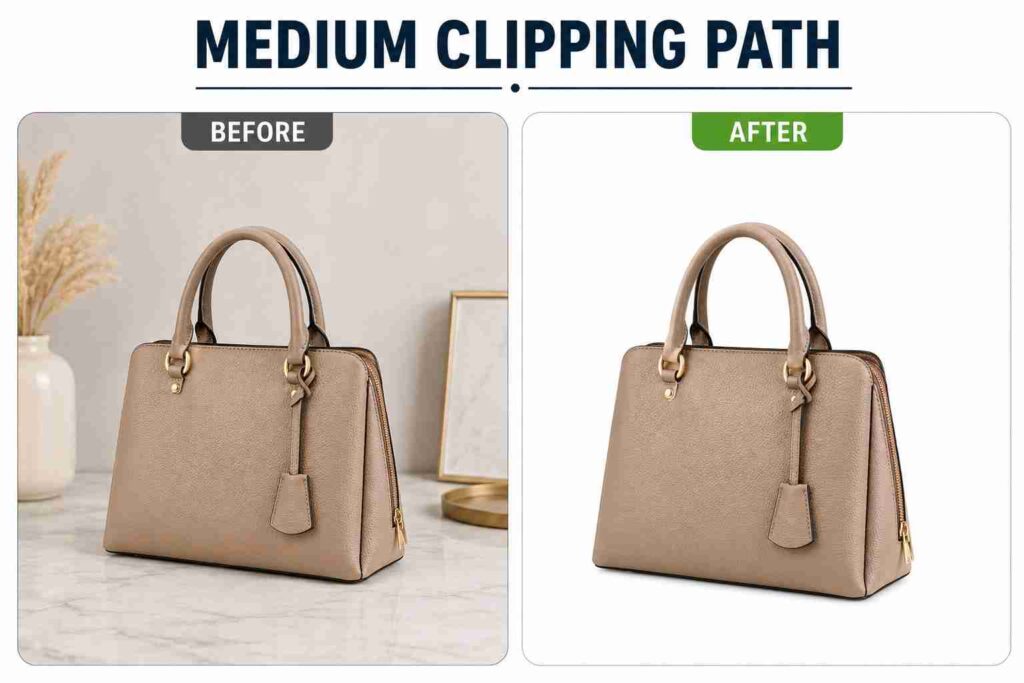
Example: A leather handbag with a handle and a hanging tassel.
Complex Clipping Path: This type is used for objects with detailed shapes, sharp curves, and many small parts. It needs a lot of anchor points and careful tracing to keep every edge clean and accurate.
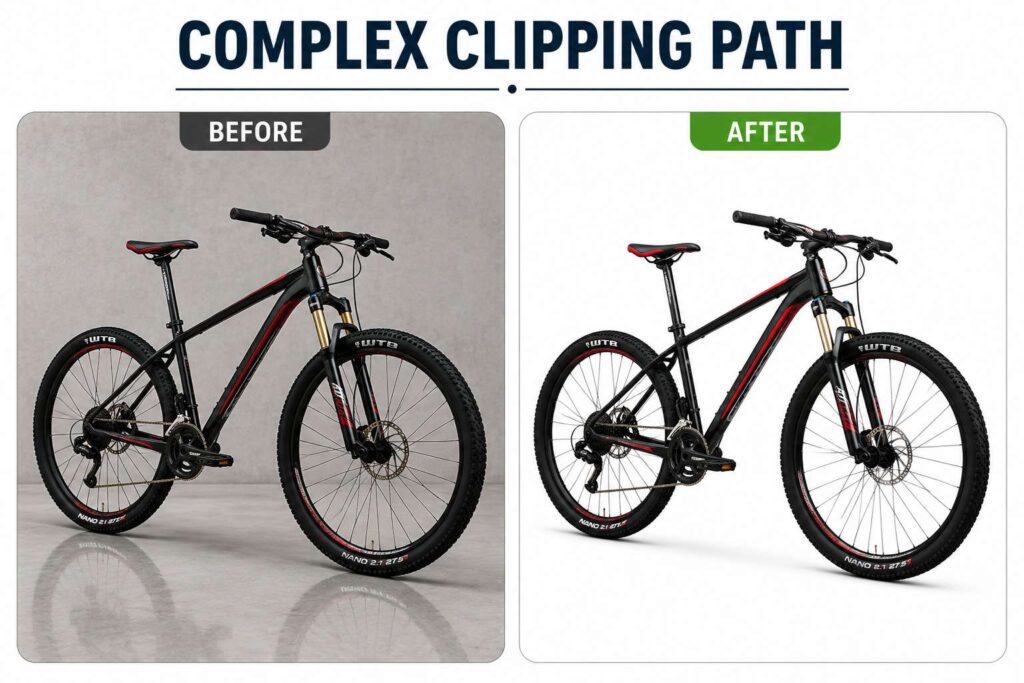
Example: A chandelier with layered crystal drops and curved metal arms that need precise cutting.
Super Complex: the tough ones. Flowing hair, fur clothing, busy backgrounds. Usually this is where masking gets combined with the path anyway.
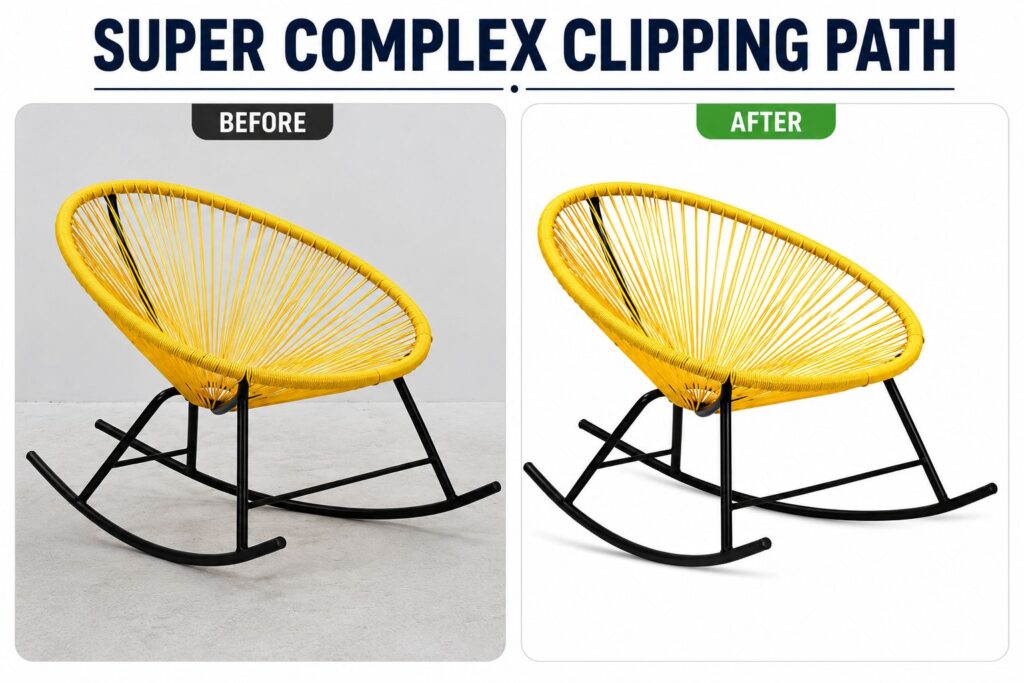
Example: A double-band diamond ring with tiny stones set close together, needing precise tracing around every edge.
Knowing which bucket your images fall into means you get an honest quote instead of a random number pulled from thin air.
How Clipping Path Actually Gets Made
Here’s the real process, step by step:
- Open the image in Photoshop or Illustrator.
- Grab the Pen Tool, this is what lets you draw the line by hand.
- Zoom in. Editors who actually care zoom in to 200%, sometimes 300%.
- Trace the edge. More points on the curves, fewer on the straight parts.
- Close the path by connecting back to your first point.
- Turn it into a selection.
- Remove or swap the background.
- Export in a format that keeps things clean, usually PNG.
Sounds easy written out like that. It isn’t, not really. A rushed job leaves rough edges or a faint color halo hanging around the product. Done right, it looks like the background was never there in the first place.
AI Clipping Path vs Manual — Which One Should You Actually Trust?
Everyone’s got an opinion on AI background removal right now, so let me just be straight about it.
AI is genuinely fast. It can chew through hundreds of simple images in the time it’d take a person to finish two or three. It’s usually cheaper too. And on easy shots, plain background, high contrast, it does a decent job.
Where it falls apart is detail. Hair, fur, thin jewelry chains, AI tends to leave things jagged or half-erased. Glass and chrome confuse it. So does anything where the background color is close to the product color. And it can’t make judgment calls, like whether to keep a soft shadow because it looks natural, or whether that faint highlight is part of the product or just noise.
If your catalog is simple stuff on white backgrounds, AI will probably save you money. If you’re shooting jewelry, fabric, hair, or glass, a human editor usually saves you more in the long run, just not in the way you’d expect. You save it in returns and refunds you never had to deal with.
Manual Clipping Path: Why It Still Wins Where It Actually Counts
A manual clipping path just means a real person zoomed into your photo and traced it by hand with the Pen Tool. No guessing software, no shortcuts.
It beats AI in a few specific spots. Fine detail stays sharp instead of blurry. Reflections on glass or metal look natural instead of flattened. Busy backgrounds don’t trip up a trained eye the way they trip up an algorithm. And judgment calls, keeping a shadow, fixing a stray highlight, that’s something only a person really gets right.
If your image is going on a billboard, in a glossy catalog, or it’s got hair, fur, or glass in it, manual is the safer bet almost every time. Slower, sure. But it’s the difference between a photo that looks edited and one that looks like it was never in the background to begin with.
Simple way to think about it: AI for speed and easy shots. Manual when the image actually has to look perfect.
Who Actually Needs This Kind of Service?
It’s not just the big e-commerce brands. I’ve worked with all kinds of people over the years:
- Online store owners who want their listings to look consistent
- Photographers prepping client deliverables, product, fashion, portraits
- Graphic designers putting together ads and brochures
- Jewelry sellers, where every reflection has to be perfect
- Fashion brands shooting on models or mannequins
- Print and catalog companies who need images crisp on paper
- Marketing agencies building out campaigns
- Social media creators trying to make their feed look polished
Basically, if how your images look affects whether people trust or buy from you, this applies to you.
Should You Do It Yourself, or Just Outsource It?
Depends entirely on how many photos you’ve got.
Five images for your own tiny shop? Learn the Pen Tool. It’s a decent skill to have anyway.
Hundreds or thousands of product photos? That’s a different story. Doing it yourself will eat your whole week, and probably your patience too. That’s usually when people start looking for someone to outsource it to.
What you actually get from a good clipping path company: your time back, a catalog that looks consistent, fewer mistakes than a rushed automated job, and honestly it’s usually cheaper than hiring and training someone in-house.
Clipping Path in Illustrator, A Bit Different
Illustrator does this its own way, and it trips people up.
In Illustrator you’re not making a path exactly, you’re making a clipping mask. Here’s the short version: put your image and your shape on the same artboard, with the shape sitting above the image. Select both. Go to Object > Clipping Mask > Make (or just hit Ctrl/Cmd + 7). Everything outside the shape disappears, and only what’s inside stays visible.
Designers use this a lot for packaging, creative layouts, anywhere an image needs to sit inside something that isn’t just a plain rectangle.
What Actually Makes a Good Clipping Path Provider
A few things I’d check before trusting anyone with your photos:
Do they hand-draw the tricky parts, or just run everything through an automatic tool? Do they actually tell you when you’ll get your images back, or just say “soon”? Will they fix mistakes without charging you again? Can they handle 500 images just as well as 5? Do they have real samples or reviews you can actually look at?
And honestly, do they even know the difference between a clipping path and masking? If someone tries to charge you the same rate for every image regardless of complexity, that tells you something.
Why We Built Clipping Beast
I’ve watched too many stores lose sales because of bad product photos. That’s really the whole reason this company exists.
We hand-draw the hard edges instead of running everything through some automatic tool and shipping it out the door. Our team works with stores, photographers, and studios all over, and at this point we’ve seen pretty much every way an automatic tool can mess up an image, and how to actually fix it.
What you get with us: hand-drawn accuracy where it matters, delivery windows we actually communicate clearly, free revisions if something’s off, pricing that doesn’t hide fees in the fine print, and real people answering when you have a question.
We’re not trying to be the cheapest option out there. We’re trying to be the one you stop worrying about.
Where People Actually Use Clipping Paths
Not just online stores. You’ll find these everywhere once you start looking:
- E-commerce listings that make people trust the buy button
- Ads, where a subject gets lifted onto a totally different background
- Print and catalogs, where images need to stay sharp on paper
- Jewelry and fashion shots, where the tiniest edge matters
- Social posts, where a polished image is the difference between a scroll-past and a stop
Quick Answers to Common Questions
What is a clipping path used for?
Mostly to cut a product out of its background so you can place it on something new. Very common in online stores.
How is a clipping path different from image masking?
Think of a path as a hard cut with a scalpel, clean edges, all or nothing. Masking is more like blending with a soft brush, built for messy edges like hair. A lot of tricky photos need both.
Is AI background removal as good as manual editing?
For simple, high-contrast shots, sure, it holds up fine. For hair, jewelry, glass, or busy backgrounds, a human editor almost always gets you a cleaner, more natural result.
How much does a clipping path service actually cost?
Depends on complexity. Simple stuff costs less. Detailed images with hair or jewelry cost more. Get a quote based on your actual photos, not a generic price list.
Can you make a clipping path in Illustrator?
Yeah, it’s called a clipping mask there. Put a shape over your image and use Object > Clipping Mask > Make.
The Bottom Line
Your product photo might genuinely be the only shot you get with a shopper. A messy background costs you sales you’ll never even know about. A clean one builds trust before they’ve even read the title.
That’s what a good clipping path does. And it’s what we do at Clipping Beast, every day, for stores just like yours.
Want to see the difference for yourself? Send us a batch of your photos and judge the results before committing to anything else.